How to Paint on Wood Tips by Painters for House
Painting on a wooden floor is trendy. And with the help of Painters for House, you can get a new look on the wooden floor! And also, a painted floor modernizes the decor of the room.
As you can imagine, painting a wooden floor is not easy. But with a good technique, you can improve the look of your house by wood painting floor, doors, furniture, etc.
To get a good quality of work done, therefore you need to educate yourself. Like the type of wood, invest in good quality tools and paint to ensure the best results.
Here Toronto house painter shares the easy tips and techniques to paint on a wooden item in the house.
Required Tools to Paint on wood
The material/tools depend on the design and finish you want to achieve as well as the condition of the wood. It is important to remember everything before purchasing the equipment. In general, to paint on a wood surface you will need the following equipment:
- Adequate clothing
- Gloves, a mask, and eye protection
- One set for painting (roller, tray, cage, and roller)
- A brush
- Sandpaper
- A biodegradable degreaser
- A stripper
- The primer sealer
- The varnish
- The paint for wood
- Wood restorer (if your wood is rotten, aged, and deteriorated)
Painting Steps by Painters for House
Surface preparation
As obvious as it sounds, this is still the most overlooked part of wood painting jobs. And yet, it is one of the most important steps in painting a wood surface and achieving a quality finish.
In this sense, you must take your time to prepare your wood. This step improves the adhesion of the paint and offers a durable finish. Beforehand, clean the wood surfaces sanded and primed. In this order.
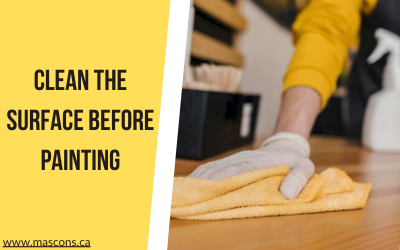
Clean wood
Nothing is annoying for painters to painting on a dirty, oily, or greasy surface. Moreover, a surface that has not been washed beforehand can prevent the adhesion of the paint. Delay the drying time and cause yellowing of the paint.
This is why it is important to spotless the wood surface remove grease stains and dirt. You can start by vacuuming followed by sweeping with a damp cloth. Painters for the house recommend applying oil, grease, and other contaminants stains.
You may also have paint residue on the wood. In this case, be sure to remove the remaining paint with a putty knife. Be sure to scrape off as much paint as possible. Don’t worry too much about small spots of residual.
If the paint does not come off, use a stripper. Allow the wood to dry completely before proceeding to the next step.
Sand the wood
Must sand the wood surface before applying any material. Sanding ensures a smooth surface while increasing porosity and gets rid of unwanted particles.
Before you start, make sure the wood is dry. Then start with the rougher parts of the surface and use very coarse or coarse sandpaper (40-60). The idea is to perform a roughing of these parts.
For less rough surfaces with few imperfections, sand with medium-grit sandpaper (80 to 120). Finally, use sandpaper with a fine-grit of 150 or more to ensure a quality finish. A smooth surface is needed to apply the primer or paint.
During this step, make sure to work with the grain of the wood. When you complete sanding, use a vacuum cleaner to remove the dust, then wipe the surface again with a damp cloth.
Tips for sanding wood properly
- Always sand in the direction of the grain of the wood;
- Do not use a wire brush or steel wool, as they can damage the texture of the wood;
- Avoid insisting on the same place and do not press too hard to avoid making hollows;
- Fill cracks/holes
A wood surface has often several cracks or holes. These make the job more difficult. It gives a less satisfactory result, so repair them. To do this, you can apply wood filler using a spatula.
Use a spatula or flexible putty knife and fill the crack or hole with wood filler. It is better to use too much than not enough in this step, as some wood pulp tends to shrink as it dries.
Smooth everything with your spatula then let harden. Once the surface is dry, sand the paste with a fine-grit sandpaper. Apply masking tape to the parts of the surface that you do not want to paint
If you want to keep part of your furniture, floor, door … intact, use masking tape to protect the parts of the wood that you do not want to paint. It is advisable to buy latex-based tape that is designed for wood painting. These types of tapes adhere well to wood to prevent paint seepage or slippage.
Apply paint
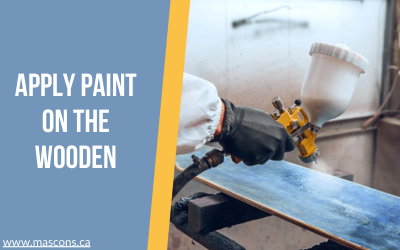
After preparing your wood surface, it’s time to take action. The application of the paint is done in several stages according to painters for house:
How to choose the paint
Everything about the choice of colours, texture, finishes. It is a personal decision which depends on the preferences of each one. On the other hand the type of paint, it is advisable to use latex paints, that is to say water-based, to paint on wood.
It is also up to you to choose the type of finish you prefer, whether it is a matte, satin, or gloss finish. Be aware that glossy paints sparkle when exposed to light, while flat paints absorb light and hide imperfections.
Regardless of the type of paint and the products you use, choose good quality paints and products to get a durable finish that lasts over time.
Apply a coat of primer
By its porous nature, wood absorbs paint unevenly, so applying a primer-sealer before wood painting is a critical step. The primer allows you to even out the grain of the wood for a uniform finish and vivid colours. It also helps you hide any stains, smoke damage, etc.
The application of the primer is very easy. You only need to apply one or more even coats with a brush. Roller while following the product instructions for drying time. The number of coats to apply. Make sure the last coat of primer is completely dry before you start painting.
Tips to apply primer by painters for a house:
- Give your primer time to dry well before applying the paint;
- For dark woods, it is best to apply several coats of primer;
- Gray primers are best used for darker paint and other whites or transparencies for lighter paint colours;
- For wood, it is best to use an oil-based primer as the latex may raise the grain of the wood.
- Wood Painting
You are finally at the long-awaited stage, the painting of wood. You can use a brush or roller, depending on the size of the surface you wish to paint.
Paint with a brush on wood
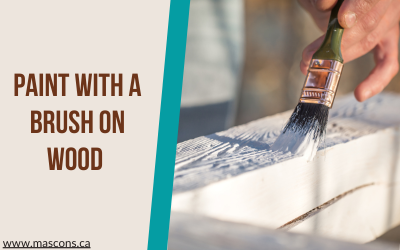
If you are using a paintbrush, invest in a quality paintbrush that has neither too coarse nor too coarse bristles. With a brush soaked in paint, paint your surface from top to bottom.
Be sure to paint with the grain of the wood, with a complete paint stroke from start to finish.
Brush lightly and in one direction, this eliminates the appearance of brush strokes. These apply as many coats of paint as necessary to achieve the desired result.
Paint with a roller
If you choose to paint with a roller, go for smaller rollers that are easier to handle. Again, it is better to invest in a quality role.
Apply your paint with little pressure to prevent unwanted roller marks from appearing. Finally, roll over the surface you just painted with an almost dry stroke to reduce marks and remove excess paint.
- Bonus painting Tips: If your paint job spans several days & you want to save some cleanup time. Place the brushes and rollers in a sealed plastic bag and put them in the fridge. This will keep them moist.
The finish
Today, many paints contain protective materials that help protect the paint from water or wear. But, it is advisable to add a layer of protection to your wood to guarantee its durability over time and its resistance against damage. Today’s varnishes offer several choices of finishes. You will thus have the opportunity to get the desired finish for your project.
Varnish the wood
Applying the varnish protects your surface and guarantees a smooth and pleasant finish. It allows the topcoat to stick more evenly to the surface of the wood.
The varnish is a bit denser than the paint, so it is best to gently tap the brush to remove the excess varnish. Then use brush strokes, avoiding bubbles and drips.
To achieve a soft-touch finish & good adhesion, sand lightly with fine-grit sandpaper between coats of varnish.
Wood finishing
The topcoat is a kind of final coating that protects your wood. This last step consists of applying a topcoat that will guarantee maximum protection for your wood, especially if it is exposed to some exposure (door outside, patio, etc.). Follow the directions mentioned on your product and apply your topcoat until you get the result.
Contact today the best painters for the house in Toronto fill the form below and get a free quote.