


Drywall Installing and Drywall Lifting on the roof is by far the most difficult part of Placing Drywall in the Building.
While the skill of the perfect finish only comes with practice, but beginners make several common mistakes.
Avoiding some common drywall install mistakes can help you avoid the costs and hassle of repairing drywall.
Not reading the proper instruction given by Drywall Installer about how to use the drywall tool or material properly is the reason for failure. Keep in mind to read every detail about the drywall installation guide by the professional as given in our articles.
Simple Tips to Avoid Drywall Installation Mistakes
- Not allowing insulation, ventilation, humidity control, and wiring before drywall installing
- Do not install nail guards where wires or pipes pass inside studs, nails or screws will not penetrate
- Place seams at the corners of the doors
- Contamination of the compound with debris or dried chips of compound
- Do not have nail pattern inspected (check local code before covering nails with compound or tape
- Do not have insulation and utilities inspected (check local code) before covering with drywall
- Do not sand between coats of drywall compound
- Drive nails too deep to break the paper on the panels
- Do not use drywall nails
- Do not sand the last coat of compound to achieve a smooth finish
- Do not about two drywall panels at the bevelled edge of the plant
- Ding or damage the edges of the panels
- Do not completely cover the tape with compound
- Do not apply drywall to the ceiling before applying drywall to walls
- Do not about the sheets on a stud or a rafter
- Applying drywall sheets with the wrong side exposed
- Create more seams than is necessary (i.e. using small pieces)
Common Drywall Problems and Solution


Problem 1: Inside corners are irregular
Solution: Try a metal reinforced corner drywall tape. It combines a metal angle with paper flanges for a perfectly formed and smooth inside corner. The metal also gives your knife a smooth, stiff surface to straddle the corner.
Problem 2: The outside corners are rough and brittle
Solution: Instead of using standard paper tape on the outside corners, spend a few pennies more for the outside metal or plastic heel.
The corner bead is more durable and much easier to install than paper corners only. Save the paper tape for outside corners that don’t receive any traffic, such as partitions or skylights.
Problem 3: Dry the drywall mud on the inside corners before the tape continues
Solution: Before laying the mud for drywall, cut your paper tape to length and pre-fold it.
If you using metal-reinforced drywall tape cut it to length and keeps it ready before plugging the corner. Either way, it’s also easier to measure your tape because there isn’t any drywall mud on the wall yet.
Problem 4: The drywall stripe appears through the mud
Solution: According to Drywall Installer Toronto, there are three layers of mud (at least): duct tape, filler layer, and final layer. You may exclude the final layer. The ribbon should show through the filling mantle. If not, your fill layer is too thick. Only while the final coat covering with the tape.
If your first final coat doesn’t cover the strip, apply more coats, but keep them thin.
Problem 5: Unable to hide mesh tape on butt joints
Solution: This can be difficult to resolve and this is why a lot of drywall prefers duct tape over butt joints. To be clear. Butt joints are those unions where two boards join at their square edges (not tapered), so there is no rest for mud and tape.
If you’ve used mesh tape before and covered it with mud (and it still shows), continue to apply thin final coats with a 10 or 12-inch drywall knife, gradually building the joint in the middle to cover the ribbon. Filling it on both sides so that everything is flat.
Problem 6: Unable to hide the paper strip on the butt joints
Solution: Since you don’t have edging a cone creating an indentation for the tape and mud, the tape is mounted on the drywall. Yes, it takes patience, but you need to gently apply the last layer and use it well with your 10 or 12-inch knife. The biggest mistake with butt joints is using too much mud under the tape, creating a bump that is hard to hide with all the thin final coats.
How to fix a hole in Drywall in 7 Steps by Drywall Installer
The most common cause for a hole in drywall is the door handles turning around and hitting the wall. Of course, virtually anything can cause a hole in drywall.
Drywall is a fairly brittle material, typically half an inch thick and made up of gypsum and paper. That is not meant to be waterproof,
Drywall Tool you need to fix that hole
- Self-adhesive tape
- Composed of drywall (“mud”)
- Drywall sanding sponge
- Utility knife
- Four-inch putty knife
Procedure
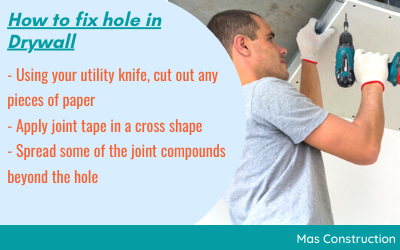
- Using your utility knife, cut out any pieces of paper or drywall that may protrude from the surface of the wall. You need the wall to be perfectly flat before repairing the hole.
- Cut two sections of the mesh joint tape, so that each length of tape extends at least 2 inches past each side of the hole.
- Apply joint tape in a cross shape, piece to piece.
- Using a putty knife, carefully cover the entire area with joint compound, lightly pressing joint compound through the mesh.
- Spread some of the joint compounds beyond the hole, then smooth with the putty knife.
- At this point, don’t worry that the mesh strip is visible. Once this layer has dried solid, lightly sand the high points.
- Repeat the above process at least two more times, going between each layer until you have a smooth patch over the hole.
Thanks for reading the article, Here Mas Construction the professional drywall installation services provider in Toronto (GTA). Contact us today